
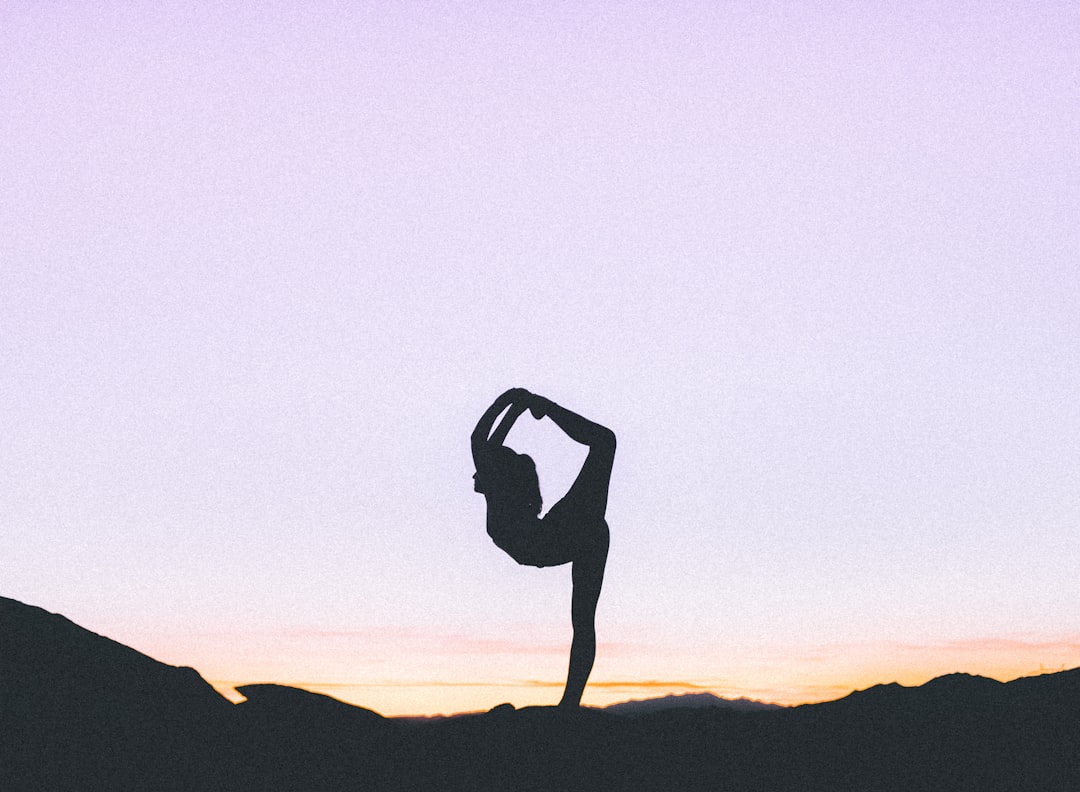
Build a Balanced Beginner Yoga Routine: 20-Minute Mat Workouts for Athletes
A 20-minute beginner yoga system for athletes: routines, alignment cues, breath work, progressions, and recovery flows.
Build a Balanced Beginner Yoga Routine: 20-Minute Mat Workouts for Athletes
If you train hard, a yoga practice should do more than “stretch things out.” It should help you move better, recover faster, and build the kind of body awareness that keeps your performance high and your injury risk lower. This definitive guide gives you a practical beginner yoga routine built around 20-minute mat workouts for athletes, with clear progressions, alignment checkpoints, breath practices, and daily sample sequences you can repeat without overthinking. If you want a dependable starting point, you can also explore our 10-Minute Morning Yoga Flow to Wake Your Body and Mind and use it as a shorter reset on busy days.
What makes this approach different is that it is designed for consistency, not perfection. Instead of chasing advanced shapes, you will learn how to organize a short practice around three athlete-friendly goals: strength, mobility, and recovery. Along the way, you will see how to use a morning flow as an activation tool, how to use easy yoga sequences on rest days, and how to keep your practice grounded in sound technique. The goal is to make yoga feel as trainable and measurable as any other part of your fitness plan.
Pro Tip: For athletes, the best beginner yoga routine is not the longest one. It is the one you can repeat 4 to 6 times per week, with enough structure to feel familiar and enough variety to support the way you actually train.
Why Athletes Need a Different Beginner Yoga Routine
Yoga should complement training, not compete with it
Athletes often approach yoga with a performance mindset, which can be a strength if it helps them stay consistent. The challenge is that many first-time practitioners try to force flexibility instead of building control. A balanced practice should improve range of motion, but it should also teach you how to stabilize that new range with strength and breath. That is why a thoughtful routine beats random stretching every time.
Think about the demands of sprinting, lifting, cycling, basketball, tennis, or combat sports. These activities create repeated patterns: hip flexors tighten, thoracic rotation gets limited, shoulders get overused, and ankles lose smooth dorsiflexion. A smart yoga sequence for flexibility should address these patterns with slow, deliberate work rather than aggressive end-range pushing. If you need a reliable warm-up template, our 10-minute yoga flow is a useful model for bringing the body online without fatigue.
The performance payoff is movement quality
Yoga is often described as recovery, but for athletes it is also movement education. A good session can improve balance, coordination, breathing efficiency, and tissue tolerance. That matters because the body does not “learn” flexibility in isolation; it learns how to coordinate breath, posture, and control under load. In practice, this means your routine should include a blend of standing shapes, floor-based mobility, and short holds that build isometric strength.
That is also why the best results often come from simple yoga poses for beginners done with precision. A well-aligned low lunge may do more for your hip function than an ambitious pose you cannot breathe in. When you build your practice around quality rather than difficulty, you get more consistent returns from every minute on the mat.
Consistency beats intensity for long-term adaptation
Twenty minutes is an ideal training window for many athletes because it reduces friction. It is long enough to create a meaningful stimulus, but short enough to fit between practice, work, and recovery. You can use the same base plan repeatedly, then progress it in small ways every one to two weeks. This is much more sustainable than trying to memorize a new sequence every time you roll out the mat.
If you want another example of how short sessions can work, look at the structure used in beginner-friendly morning yoga routines: clear timing, familiar transitions, and a focus on breath-led movement. That same logic scales beautifully into a 20-minute athlete-focused plan.
The 20-Minute Framework: How to Build a Balanced Session
Minute 1-3: Downshift and assess
Start by noticing your baseline. Are your hips tight from running? Are your shoulders stiff from pressing or swimming? Are you mentally amped up from competition or work? A brief arrival period lets you stop “living in output mode” and start moving with intention. Sit, stand, or lie down and take a few rounds of nasal breathing, then scan the body from head to toe.
This first phase is where many athletes make the biggest mistake: they rush. A beginner yoga routine works best when you use the opening minutes to reduce noise in the nervous system. If you do that well, the rest of the session feels smoother and the poses tend to align better naturally.
Minute 4-8: Activate major movement patterns
The next block should warm the spine, hips, shoulders, and ankles with simple, repeatable patterns. Cat-cow, thread-the-needle, low lunge, and a gentle forward fold are excellent choices because they teach both mobility and control. These are not flashy yoga poses; they are foundational shapes that help your body prepare for standing, hinging, reaching, and rotating.
Use this phase to coordinate breath with movement. For example, inhale to lengthen the spine, exhale to fold, inhale to widen the chest, exhale to soften the hips. This simple rhythm makes yoga breathing exercises feel practical rather than abstract. If you want a more structured entry point into the sun-based warm-up tradition, study the sun salutation steps in our beginner flow and adapt them to your pace.
Minute 9-15: Build strength and mobility together
This is the heart of the session. Choose 4 to 5 poses that challenge you without overwhelming you. A balanced set might include chair pose, plank, downward-facing dog, low lunge, and warrior II. The point is not to chase exhaustion; the point is to reinforce joint stability, trunk control, and smooth transitions. Athletes benefit especially from isometric holds because they translate well to sport.
At this stage, pay attention to how the pose feels under load. Are you collapsing into one hip? Are your shoulders creeping to your ears? Are your knees tracking forward and inward? Those details matter, and they are what separate casual movement from actual training. The better your pose alignment tips, the more effective the session becomes.
Minute 16-20: Recover and integrate
Finish with poses that reduce tone and restore breathing: seated forward fold, supine figure-four, happy baby, or legs-up-the-wall. This final block helps transition the body away from work and toward recovery. If you end with three to five slow breaths in a supported shape, you leave the mat calmer, not just more flexible.
Recovery is not an afterthought; it is part of adaptation. Many athletes sleep better and feel less “stuck” when they close their practice this way. A short ending sequence also makes the habit stick because it sends the nervous system a clear message: the session is complete.
Core Yoga Poses for Beginners: The Athlete’s Essential Library
Foundational standing and floor poses
Your yoga pose library should start with a few reliable basics. Mountain pose teaches stacked posture and foot pressure. Chair pose builds leg engagement and trunk awareness. Low lunge opens the front line of the hip while training balance. Downward-facing dog lengthens the back body while strengthening the shoulders and arms. Together, these shapes create a clean template for a beginner yoga routine that can evolve over time.
For a broader view of how entry-level shapes fit together, bookmark our yoga poses for beginners guide and treat it like a pose reference. The more familiar you become with these fundamentals, the easier it is to build a safe, repeatable sequence.
Spinal movement and hip opening
Cat-cow, child’s pose, sphinx, and half pigeon variations are especially useful for athletes because they address spinal segmentation and hip rotation. Many people think flexibility is mainly about “stretching the tight spot,” but that is only part of the picture. You also need the ability to move one segment at a time and to reduce compensations elsewhere in the body. That is why gentle spinal waves and hip-focused floor work are so valuable.
If your goal is a yoga sequence for flexibility, use these shapes strategically rather than randomly. Pair a mobility pose with a stabilizing pose. For example, follow a low lunge with chair pose, or alternate pigeon with glute bridge. This teaches the nervous system to own the movement instead of temporarily borrowing it.
Recovery shapes that calm the system
Restorative-style poses are not just for stress relief; they are essential for athletes who train frequently. Supine twist, happy baby, legs-up-the-wall, and constructive rest can lower the intensity of the session and allow the breath to slow naturally. They are especially useful after hard intervals, long lifts, or competition days when the body wants recovery more than stimulation. These poses also work well if you are coming back from a demanding week and need a lower-cost practice.
When you build sessions from these basics, you give yourself a dependable home practice that does not depend on motivation or perfect conditions. That reliability is one of the biggest hidden advantages of yoga.
Alignment Checkpoints That Prevent Common Beginner Mistakes
Feet, knees, and hips
Proper lower-body alignment starts from the ground up. In standing poses, spread the toes, root through the big-toe mound, and avoid rolling all your weight to the outer edge of the foot. In lunges and squats, keep the knee tracking in line with the second or third toe rather than collapsing inward. These small corrections can dramatically change how stable and powerful a pose feels.
One common beginner error is using the joints for passive support instead of the muscles for active support. Athletes usually benefit from a more engaged approach, because the body already understands effort. You are simply redirecting that effort into safer mechanics.
Ribs, pelvis, and spine
Another major issue is over-arching the low back. In poses like upward dog, lunge, and warrior variations, keep the ribs from flaring and the pelvis from dumping forward. Think of gently lengthening the tailbone and drawing the lower ribs in without stiffness. This protects the lumbar spine while allowing the hips and upper back to contribute more honestly to the movement.
Good pose alignment tips often sound subtle, but they are powerful. If you can keep a long, neutral spine while breathing smoothly, your practice becomes both safer and more athletic. That is the standard to aim for in your 20-minute sessions.
Shoulders, neck, and head
The upper body also deserves attention, especially for athletes who already spend time under load. In plank and downward dog, press the floor away and keep the shoulder blades broad without sinking between the ears. In standing postures, let the neck remain long so your gaze supports balance instead of creating tension. The head should feel like it is floating above the spine, not gripping for control.
If you struggle here, reduce the range or use props. A block under the hands, a bent-knee down dog, or a shorter lunge stance can preserve alignment while building strength. That is a better choice than forcing a shape that you cannot yet maintain.
| Pose | Main Benefit | Beginner Cue | Common Mistake | Easy Modification |
|---|---|---|---|---|
| Mountain Pose | Posture and balance | Root through all four corners of each foot | Locking knees | Stand with a wall behind you |
| Chair Pose | Leg strength and trunk control | Sit hips back, ribs stacked over pelvis | Overarching the low back | Keep hands at heart center |
| Low Lunge | Hip mobility | Lengthen through the back leg | Letting front knee drift inward | Place back knee down |
| Downward-Facing Dog | Shoulder strength and hamstring opening | Press evenly through both hands | Collapsing into the shoulders | Bend knees generously |
| Seated Forward Fold | Recovery and posterior chain release | Hinge from the hips with a long spine | Rounding hard to reach farther | Sit on a folded blanket |
Daily Sample 20-Minute Routines You Can Rotate Through the Week
Day 1: Strength-focused session
Begin with one minute of nasal breathing, then move through cat-cow, downward dog, plank, chair pose, warrior II, side angle, and bridge pose. Hold each working pose for three to five breaths, focusing on steadiness rather than depth. This session should feel like controlled effort, similar to accessory training in the gym. Finish with a supine twist and a calm three-breath pause.
Strength sessions work best when the transitions are clean and the breath remains smooth. If you lose control in the transitions, shorten the sequence and simplify the poses. The goal is to leave the mat feeling stronger, not depleted.
Day 2: Mobility-focused session
This session prioritizes the spine, hips, and shoulders. Try child’s pose, thread-the-needle, low lunge, half split, lizard variation, seated twist, and figure-four. Hold the stretches gently and use the exhale to soften without collapsing. Think of it as moving through your restrictions, not attacking them.
For athletes who need a more deliberate flexibility practice, this is your yoga sequence for flexibility day. Keep the effort moderate and the pace unhurried. That combination lets the tissues adapt without creating unnecessary soreness.
Day 3: Recovery-focused session
When your body feels heavy, use a lighter sequence: constructive rest, cat-cow, supported child’s pose, supine hamstring stretch, happy baby, and legs-up-the-wall. The whole session should feel more like regulation than training. Your job is to reduce friction in the body and settle the breath.
This is a perfect choice after intense sports practice, travel, or a poor night of sleep. You will often feel the payoff the next morning in easier movement and better readiness. If you want to keep the habit on lower-energy days, this is the session to protect.
Day 4: Mixed athletic flow
Combine the best parts of the other sessions into a balanced practice: mountain pose, chair, low lunge, down dog, warrior II, half split, glute bridge, and reclined twist. This is the most “all-around” version and works well when you do not know what your body needs most. It blends activation, mobility, and recovery into one efficient block.
Many athletes find this to be the most sustainable format because it mirrors how the body works in real life. It does not isolate only one quality; it trains the transition between qualities, which is exactly what sports demand.
Breath Practices That Make the Routine Work Better
Use the breath to set pace
Breath is not just a relaxation tool. In yoga, breath is the metronome that keeps you from rushing or bracing unnecessarily. A steady inhale can help you lengthen through the spine, while a slow exhale can help you stabilize or deepen into a shape with less strain. In a 20-minute practice, that rhythm is what keeps the sequence from becoming frantic.
For beginners, the simplest breath practice is nasal breathing with a comfortable, unforced pace. If that feels easy, you can add an extended exhale to encourage downregulation. Keep it practical, especially if you are coming from high-intensity training where your nervous system already runs hot.
Match breath to movement patterns
Classic yoga breathing exercises become useful when they are paired with specific movement tasks. Use inhales during spinal extension or expansion, and exhales during folds, twists, and core engagement. During holds, keep the breath smooth and quiet so you do not create unnecessary pressure. If you are gasping, the pose is probably too ambitious for your current level.
For more gentle, beginner-friendly rhythm work, pair your sequence with the breathing guidance in our simple breath-led flow. The lesson to remember is that breath should support your nervous system, not become another performance metric.
Keep one breath “test” in every session
A useful self-check is to ask whether you can complete a full exhale in each major pose. If you can, the pose is likely within a productive range. If you cannot, you may be gripping, overreaching, or using too much effort. That single test helps athletes distinguish between useful intensity and hidden strain.
Pro Tip: If your breath becomes short in a pose, reduce the shape by 20 to 30 percent. In yoga, the right version of the pose is the one you can breathe in fully, not the one that looks deepest.
Progressions for Weeks 1-6: How to Level Up Safely
Weeks 1-2: Learn the shapes
Use the same few poses repeatedly so your body can map them accurately. Focus on foot placement, spinal length, and shoulder position. At this stage, less variety is better because it helps you learn how the sequence feels. Keep holds shorter and use support freely.
This is also the time to observe what your body prefers after training. Some athletes feel better with more hip opening, while others need more upper-back work. Treat this phase like data collection, not performance.
Weeks 3-4: Add time or transitions
Once the basic shapes feel familiar, either hold poses longer or add a gentle transition between them. You might step from down dog to low lunge more slowly, or stay in warrior II for an extra breath. The purpose is to create more control without dramatically increasing difficulty.
If you enjoy structured sequencing, you can compare how your routine evolves against our broader pose library approach. Progress in yoga does not always look like new shapes; often it looks like better timing, smoother breathing, and cleaner alignment.
Weeks 5-6: Introduce light challenges
Only after the foundations feel steady should you add more complex variations, such as high lunge, crescent twist, side plank, or half moon prep. Use these as tests of control, not as proof of advanced ability. If the base shape falls apart, back off immediately and rebuild from the simpler version.
This slow progression is especially important for athletes who are already taking physical stress from their main sport. Yoga should support your total workload, not compete with it for recovery resources.
How to Make the Practice Stick in Real Life
Use session templates instead of improvising
The easiest way to stay consistent is to decide in advance which type of day you are doing. Create three templates: strength, mobility, and recovery. Then choose the one that matches your training load and energy level. This removes decision fatigue and keeps your habit intact when motivation is low.
Many successful habits are built this way because they reduce the number of decisions required. If your routine is simple, repeatable, and attached to a clear goal, it becomes easier to maintain than a more “creative” practice that changes every day.
Attach yoga to an existing training cue
For athletes, the best habits are often anchored to something you already do. You might practice after a cooldown, before bed, after a run, or right after your shower. That way, yoga becomes part of the training ecosystem rather than a separate lifestyle task. Keep the mat visible and the routine short enough that it never feels like an event.
You can also use a reference flow like our morning sequence on days when you need a fast win. That can protect momentum and prevent all-or-nothing thinking.
Track how you feel, not just what you do
After each session, write down two things: what felt easier and what still feels restricted. Over time, you will notice patterns that help you refine the sequence. Maybe your hips improve quickly but your upper back still feels rigid. Maybe recovery days help your sleep but strength days feel too aggressive after leg training. That feedback is how a beginner routine becomes a smart, personalized system.
Consistency thrives on small wins. If a 20-minute workout makes you feel better enough to repeat it tomorrow, it is working exactly as intended.
Common Questions Athletes Ask Before Starting Yoga
Many athletes worry that yoga will make them “too loose,” but that fear usually comes from seeing yoga as passive stretching. A well-built routine improves control, not just flexibility. Others worry they are not flexible enough to begin, but flexibility is not a prerequisite; it is one of the outcomes. The right starting point is simply a willingness to move with attention.
It is also common to wonder whether yoga should replace mobility drills or recovery work. In most cases, it can complement both. Use yoga to cover patterns that are hard to isolate elsewhere, and you will likely find it makes your overall training more complete. If you want a broader view of how short routines can be productive, the structure of the 10-minute yoga warm-up is a helpful example of efficiency without sacrificing quality.
Frequently Asked Questions
How often should a beginner athlete do yoga?
Most athletes do well with 3 to 6 sessions per week, depending on training load and recovery needs. If you are new, start with three 20-minute sessions and see how your body responds. Consistency matters more than intensity, so a moderate routine repeated regularly usually beats an occasional long session.
Should yoga happen before or after training?
It depends on the goal. A shorter, more active flow can work well before training as a warm-up, while slower recovery work is better after training or in the evening. If your practice includes strong holds or longer mobility work, it usually fits best after sport or on a separate recovery block.
Do I need props for a beginner yoga routine?
Props are helpful, but not mandatory. A block, strap, or folded blanket can improve alignment and make poses more accessible, especially for tighter athletes. If you do not have yoga props, household alternatives like books, towels, and cushions can work in a pinch.
What if my hamstrings are too tight for forward folds?
Bend your knees and hinge from the hips rather than trying to reach the floor. Tight hamstrings do not mean you are doing the pose wrong; they mean your current range needs respect. A supported forward fold with a long spine is far more effective than forcing depth and rounding aggressively.
How do I know if I am doing a pose correctly?
Look for three signs: you can breathe smoothly, you feel the work in the intended area, and you are not forcing pain or pinching. If a pose looks good but feels unstable or breathless, reduce it. That is one of the most important pose alignment tips for long-term progress.
Can yoga help with soreness after hard workouts?
Yes, especially when the session includes gentle movement, controlled breathing, and recovery-oriented floor poses. Yoga can support circulation, restore a sense of ease, and reduce the feeling of stiffness. It is not a cure-all, but it can be an excellent part of an athlete’s recovery toolkit.
Final Takeaway: Make It Repeatable, Not Complicated
A strong beginner yoga routine for athletes should be simple enough to repeat and smart enough to support real training demands. The best 20-minute sessions combine activation, strength, mobility, and downregulation in a sequence you can trust. That is why alignment, breath, and consistency matter more than chasing difficult postures. Start with the basics, repeat them often, and let the practice build from there.
If you want to keep expanding your knowledge, continue exploring the yoga pose library and use it to refine your own sequences. You will move better when your practice is organized, intentional, and easy to come back to. And that is exactly what makes yoga useful for athletes: it fits real life, not the other way around.
Related Reading
- 10-Minute Morning Yoga Flow to Wake Your Body and Mind - A fast, energizing reset you can use on low-time days.
- Yoga Poses for Beginners - A clear foundation for learning core shapes safely.
- Sun Salutation Steps - Step-by-step guidance for building a smooth warm-up flow.
- Yoga Breathing Exercises - Breath techniques that support control, recovery, and focus.
- Pose Alignment Tips - Practical cues to improve safety and body awareness in every session.
Related Topics
Maya Reynolds
Senior Yoga Content Editor
Senior editor and content strategist. Writing about technology, design, and the future of digital media. Follow along for deep dives into the industry's moving parts.
Up Next
More stories handpicked for you

Yoga Modifications and Safe Variations for Common Sports Injuries

Building a Strong Community Through Yoga Pop-Ups
Vinyasa Flow Sequences for Flexibility: Build Mobility in 15–30 Minutes
10 Restorative Yoga Poses to Speed Recovery After Intense Training

Exploring Yoga's Role in Healing for Post-Athletic Recovery
From Our Network
Trending stories across our publication group

What Yoga Teachers Can Learn from Revenue Management: Planning, Flexibility, and Sustainable Growth

Adaptogens & Asanas: A Practical Guide for Using Herbal Support in Yoga Recovery

Teaching Culture Through Movement: How Culinary and Travel Experiences Can Inspire Better Yoga Classes

Why Revenue Managers Need Recovery Too: Yoga for High-Pressure Hotel Teams

Hot Yoga and Hydration: Mastering Your Body's Needs in the Heat
